Monday 9 December 2019

Malmi Street Drags #3 @ Helsinki-Malmi Airport - 3th of August 2019 - Helsinki, Finland

Here's a photo set from 3rd Malmi Street Drags event held this summer in Helsinki-Malmi Airport. Warm day gathered a lot people to spectate how hobbyist cars and motorcycles competed against each other on the 1/4 mile drag strip of Malmi-Helsinki Airport in two classes, Street and Vintage. Big parking lot next to the strip worked as a hobbyist car park and gathered many lots of cool classic and custom cars. Check out also my photos from Malmi Street Drags #1 😊

Plymouth Belvedere A-FX

Monday 4 November 2019

'73 Suzuki GT250 - Part 11 - GT550 front fork swap - 1/2 - Rebuilding front shock absorbers

Some of you might remember me purchasing a set of Suzuki GT550 front forks quite a long time ago. At the time I wasn't sure what to do with them until I got my GT250K project going. First I was thinking of rebuilding GT250 forks for this project but the set I have was in worse condition than these ones. Good thing about these are that they are more rigid than GT250 front forks. Main difference is that stanchions have 35 mm diameter compared to 32 mm ones in GT250. Otherwise main dimensions like spindle diameter and steering bearings are the same so it's easy to swap them. I will feature triple trees and mock up more detailed on next part. This part will cover rebuild process of front shocks.

Suzuki GT550
front forks
Below is a picture of steps how to assembly Suzuki GT250 & GT550 front shocks (left to right). Same process applies also for disassembly but from right to left. I disassembled my forks long time ago I didn't unfortunately take pictures of that process.

Steps of assembling GT550 front shock absorbers
Upper parts of old stanchions were very pitted and rusty most likely due to moisture accumulating inside headlight brackets. Since I wasn't going to use original headlight brackets and wanted to leave them exposed I went ahead and bought myself a new pair of stanchions from eBay instead trying to do anything with the old ones. I cleaned sliders and circlips, which attach to bottom of the stanchions, and installed them to the new ones.

New stanchions for Suzuki GT550 front forks

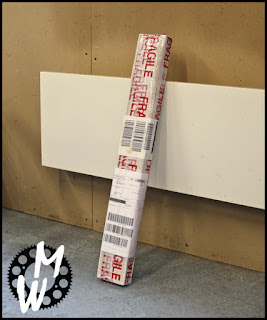
Unboxed

Comparison of new and old stanchion


Sliders and circlips in order
I decided to shave off ears from outer tubes which the stock front fender attaches to since I didn't have any use off them anymore. I started by cleaning outer surfaces of them with soda blasting gun. After that I removed most of material with a saw and an angle grinder. Since there were still a lot of excess material to be removed I used a file next. I tried to be careful and not remove too much or making too deep scratches while filing so I marked a spot with a red marker pen to indicate when to stop and move on to sanding. I used normal sand paper for rough and wet sand paper for finer sanding. Last step was to polish them with buffing wheel and polishing paste. I purchased new hardware for inner tubes and axle holders and screwed them back on.

Outer surface of outer tubes cleaned with soda blasting

Ear sawed off

I marked an area which I wanted to file flat
with a red marker pen

After rough sanding...

...and finer wet sanding

Buffing wheels and Autosol polishing paste

Outer tubes and axle holders after polishing

New M8x27 hexagon socket head screws
with low head (#51147-48130) and copper washers

Rebuilding outer tubes

Non-serrated M8 flanged nyloc nuts DIN 6926 for axle holders
After getting stanchions and outer tubes back together it was time to mate them together. I started by sliding the rebuild stanchion inside the outer tube. Before installing a new oil seal I made sure that the upper slider was inside the outer tube. Otherwise it would have been a nightmare to get the oil seal out to get it back inside. For this project I chose fork seals made by Pyramid Parts (#FOS 013) just like I did with my CBR600F. After knocking oil seal in place I put on a washer on top of it and installed circlip with circlip pliers.

Pyramid Parts fork oil seals #FOS 013

Box comes with a pair of 35x48x11 mm oil seals,
seal buddy tool, lubricate and a sticker

Slider, oil seal, washer and circlip

...and order how to put them back together

Circlip installed with circlip pliers 
Last step was to install new fork dust seals, slide in springs, add fork oil and screw on caps to top of stanchions. Since these forks originally had boots instead of dust seals I wasn't sure if I was able to find a suitable pair for them. I ended up ordering a set of Pyramid Parts fork dust seals (#DB10) which seemed to work decently well with them. I got myself a one liter bottle of 15W Motul fork oil and measured 2.35 deciliters for each shock. Caps were little bit pitted as well so I took a small piece of aluminum foil and brushed rusty spots with it under a running water. That's an easy trick to get rid off small rusty spots from old steel parts which are chrome plated. Off course it's not a permanent fix but a lot cheaper than new parts or chrome plating. I replaced old O-rings with new ones (#51181-31030) before screwing them back on.

Outer tube dimensions

Pyramid Parts fork dust seals #DB10

Springs, caps and set of dust seals

Fork inner tube caps and O-rings (#51181-31030)

Motul SAE 15W Expert Medium Heavy fork oil (#101138)

Measured roughly 2.35 decilitres of fork oil
for each shock

Rebuild Suzuki GT550 front shocks
Check out also part 2 where I complete this swap after refurbishing top and bottom yokes and fitting it to my GT250K 😎

Monday 28 October 2019

'73 Suzuki GT250 - Part 10 - Michelin Cross AC10 front and rear tires

After getting rear hub and chain line mocked up and front wheel laced it was finally time to get new tires for both wheels. Before going to my local motorcycle and moped parts dealer and repair shop I had to get rear wheel rim aligned. After visiting few bicycle repair shops who weren't able to help me due to lack of experience and tools I got hint of one local light equipment repair shop which could fix it for me. I had quite tight deadline for getting it done and without mentioning it the owner of the shop did it during evening after work and was able to get the wheel ready for me for the next day. After picking it I delivered both of my wheels straight to the next destination to get new tires put on to them. I ended up choosing Michelin Cross AC10 tires since they are also approved for street use which will help me to get through inspection.

Here's a list of all items I got installed:

- Michelin Cross AC10 80/100-21 (51R) TT front tire
- Michelin 3.00-21 MD (TR4) inner tire
- Waycom rubber rim band 21", 22 mm wide

- Michelin Cross AC10 100/100-18 (59R) TT rear tire
- Michelin 3.50-18 MF (TR4) inner tire
- Waycom rubber rim band 18/19", 22 mm wide

Wheels ready for new tires

New Michelin Cross AC10 front and rear tires installed

Michelin logo

Cross AC10

Ended up choosing 100/100-18 rear tire since there isn't
much space in the RM swingarm for a wider one

Actual width of Michelin Cross AC10 100/100-18 rear tire

Front tire size

Actual width of Michelin Cross AC10 80/100-21 front tire

Thursday 24 October 2019

'91 Honda CBR600F PC25 - Part 3 - '99 Honda CBR900RR SC33 front fork swap

I thought about couple of options I could upgrade my stock '91 CBR600F PC25 front forks to. I ended buying a set of front forks and wheels out of '99 Honda CBR900RR SC33 Fireblade. I thought USD front forks would have been too expensive and more difficult to install. I really like nineties six spoke Honda wheels which both share and I wanted to keep them on this bike. I had a hunch that these forks could just bolt on directly without any modifications but I wasn't totally sure of it. It was time to find out once I got them.

'99 Honda CBR900RR SC33 front forks


'99 Honda CBR900RR SC33 wheels

I started by taking off front fairings of my CBR. I used same technique than previously to hoist front end of my bike up. Now that fairings weren't in my way I decided to switch location of hoist strap little bit further back so that it wouldn't interfere removal of top yoke. Old front forks came off after taking off clip ons and top yoke.

Front fairings removed

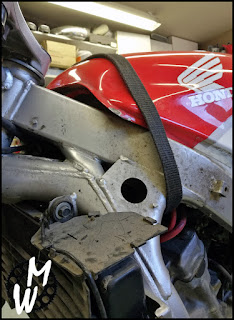
Hoist strap location

Stock CBR600F front forks removed

Installation of SC33 Fireblade forks ended up being were easy since both front forks share same steering bearings and stem dimensions. Turning radius stays same as before and nothing makes any unnecessary contact. Only thing that requires modification is steering lock mount on frame. I didn't mess with it yet since I'm not totally sure what I will end  up doing with it. At the moment front forks are just installed for mock up. Let's see what comes up next 😎


I installed stock control switches and clutch perch for now


Ignition switch cannot be installed without
modifying frame mounts

Differences between PC25 and SC33 ignition switches