New owner of the bike showed me a nice picture of his collection of older RD's, which was missing a newer liquid cooled one. He already had plans for an engine rebuild, which definitely would have been on my to do list also for the upcoming winter. All in all my now ex RD found a good home so I was happy to let it go for a fair deal. Now I will try to concentrate on getting my GT250 project finished.
Sunday, 6 November 2016
Yamaha RD 350 F2 '88 - Part 8 - Farewell
Saturday, 5 November 2016
'73 Suzuki GT250 - Part 5 - '79-80 RM/PE 250 swingarm swap
Here's first part of fitting '79 RM 250 swingarm to my '73 GT250, which at the end was a pretty easy task. Hardest part was to find all the necessary bushings for it since I didn't want to lathe them myself. I started by ordering a pair of new old stock swingarm pivot bushings (61261-40402) from eBay, which I knew I was going to need.
 |
| Pair of Suzuki swingarm pivot bushings (61261-40402). |
Next step was to find proper bushings inside the pivot bushings and bearings. After a bit of googling I came across a Kymco scooter speed up kit made by Naraku (NK800.04). Since I knew I needed bushings with 14 mm inner diameter and 20 mm outer diameter, that kit seemed like a perfect match and I ended up ordering a pair of them. They are approximately 38 mm long (37.94 mm to be exact) so I needed a spacer which would keep them a part. I ended up lathing 113 mm long spacer out of 19 x 1.50 mm steel pipe.
 |
| Pair of Naraku Speed Up kits (14 x 20 x 38 mm) for Kymco (NK800.04). |
 |
| Lathed spacer (19 x 1.50 x 113 mm). |
Once I knew how long all the bushings were I could order proper sized needle roller bearings from eBay. I decided to go with IKO TA2025Z, which are 20 x 27 x 25 mm and have open ends.
 |
| (3) Pair of IKO TA2025Z needle roller bearings with open ends (20 x 27 x 25 mm). |
 |
| Stock GT250 swingarm axle and all the new parts. |
 |
| Test fitting. |
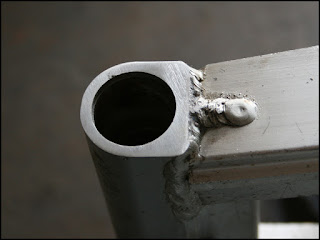
I had to narrow the swingarm a bit so it would fit better with the frame and bushings. I took a bit of material out of both sides of the swingarm with a file and a sanding block. I also made the swingarm a bit narrower than the inner bushings. With a bit of clearance the swingarm swings smoothly once the swingarm axle is tightened.
In the second part of the swingarm installation I will cover how to fit rear shock absorbers and modify their upper mounting points. But before that I have to refurbish front forks and fit them to the bike. By doing so I can check the stance and figure out how long rear shocks I need to order.
Subscribe to:
Comments (Atom)


